You look down at your ring and notice that it’s damaged. The shock, disbelief and utter despair! Maybe you hit it on the edge of a countertop, and it cracked, or you snagged it on something, and a prong got bent out of shape. Worse yet, a stone may be inexplicably missing (gasp!). Before you go into full-blown panic mode or start hatching an elaborate fix-it-yourself plan (please don’t!), take a breath and keep reading to learn what to do.
Understanding the Anatomy of a Ring
Don’t run off to a jeweler just yet! First, arm yourself with knowledge about the ring repair process, starting with learning about ring terminology. This will help you better communicate your issue to a jeweler. Here are the essential parts of a ring, starting from the top down.
- Center stone: The center stone sits in the middle of the ring and is generally the largest diamond or gemstone in the setting. It can be featured in a solitaire design or flanked by accent stones.
- Accent stones: Accent stones, also known as side stones or melee stones, are small gemstones situated around or next to the center stone.
- Crown: The crown is the top half of the center stone.
- Pavilion: The pavilion is the V-shaped section in the lower half of the center stone.
- Girdle: The girdle is the widest part of the center stone that divides the crown from the pavilion.
- Head: The head, also referred to as the crown, setting, or mounting, is a metal basket-like structure that holds the center stone securely in place and includes the prongs and gallery.
- Prongs: Prongs are small metal “claws” extending upward from the band to grip the center stone. Rings typically have four or six prongs that are either pointed, rounded, flat or V-shaped.
- Gallery: The gallery is the area under the center stone and above the shank.
- Gallery Rail: The gallery rail is a thin horizontal bar under the center stone that connects the prongs.
- Bridge: The bridge is a piece of metal underneath the head that rests on the top of your finger.
- Shoulder: The shoulder is the top two sides of a ring that rises on each side of the center stone.
- Shank: The shank is the band portion of the ring that wraps around your finger.
4 Reasons to Get Your Ring Repaired
Here are four types of ring damage that require prompt repair:
- Bent, broken, or worn-out prongs: Is your ring catching on your clothing, blankets or hair? This could signal an issue with your prongs, which could put your stone(s) at risk of falling out! In the case of a bent or worn-out prong, a jeweler typically adds more metal to the tip to strengthen it, called prong re-tipping. If a prong is broken, it may need to be completely rebuilt. If two or more prongs are badly damaged, replacing the entire head of the ring may be necessary.
- Bent or cracked shank: Is the shank or band of your ring misshapen or cracked? If it’s the former, a jeweler will place the ring on their sizing tool (called a mandrel) and gently hammer it, molding the metal so that it returns to its round shape. If it’s the latter, the two broken ends must be soldered (fused) together. If your ring is too thin or weak for a solder repair, a jeweler may recommend a half shank replacement, which involves replacing a portion of the shank with a new, thicker band. A full shank replacement may be required if the ring is severely damaged.
- Loose or missing stone(s): Does one or more of the stones in your ring feel a bit wobbly or can you hear a rattling noise when you shake it? Red alert! You likely have a loose stone. Luckily, this is often a straightforward repair that involves tightening the prongs that cradle the stone. For a stone that has vanished without a trace, however, you’ll likely have to pay for a replacement stone (unless it’s covered by jewelry insurance…more on this later) to be reset in the ring setting.
- Scratched, chipped or cracked stone(s): Did your gemstone fall victim to a hard knock? A surface scratch can usually be removed by a jeweler with a good buff and polish. For a more serious chip or crack, the gem may need to be removed from its mounting and recut and reset. If it’s irreparable, you may need to consider replacing the gemstone altogether.
Ring Repair Guide: 5 Key Things to Do
Follow these five steps to help ensure your ring is repaired successfully:
1. Assess the damage to your ring.
Carefully examine your ring to identify the part that is damaged (use the sections above as a cheat sheet).
2. Handle your ring with care.
Your ring is in a fragile state. Don't continue to wear it or you risk having more damage done to it. Designate a safe place to store it until you can bring it into a jeweler.
3. File a claim with insurance.
If you have jewelry insurance, follow the procedures outlined in your policy for filing a claim. Do this promptly to ensure you receive repair or replacement for your damaged ring. If you aren’t insured but purchased a protection plan for your ring, check to see which repairs may be covered. Don’t have any coverage? Skip to the next step.
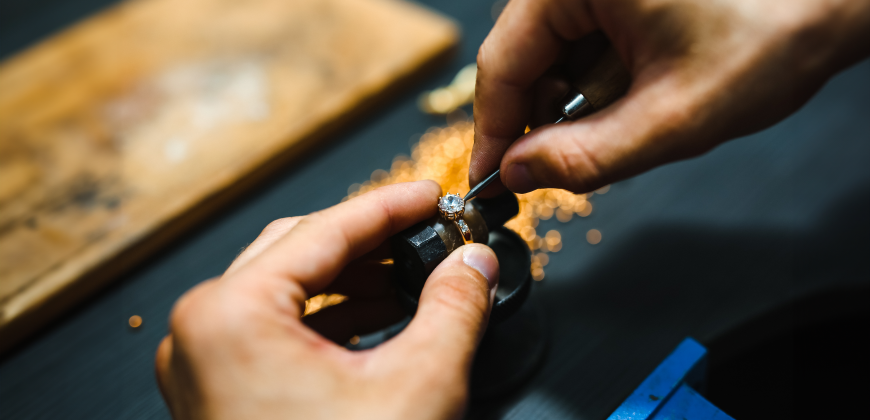
4. Schedule an appointment with a jeweler.
Make sure you have your ring repaired by a jeweler or goldsmith. Ideally, it’s best to go back to the jewelry store you purchased your ring at since they are familiar with the ring’s design and the materials used in its production. Just make sure the jeweler is approved by your insurer. One more thing—don’t wait to repair your ring. Get it fixed sooner rather than later to avoid additional damage and a higher repair bill.
5. Have patience and an open mind.
The cost and turnaround time for a ring repair depends on the nature of the damage and the jewelry store’s in-house capabilities. It’s rare that a repair can be fixed while you wait. For a complex repair, your ring may need to be sent out to a third-party or off-site repair shop. Don’t worry. Before you know it, it will be right back on your finger where it belongs!
6 Tips to Prevent Future Ring Damage
A ring that is worn often, year after year is susceptible to wear and tear and accidental damage. Think about everything you do with your hands…your ring is constantly in the line of fire! To help reduce your risk of damage or loss, keep these six tips in mind:
- Keep an eye on your ring. Steal a glance every now and then to make sure nothing is amiss.
- Clean your ring regularly. A little dish soap and water can help remove hidden dirt and debris and prevent discoloration, tarnish and damage to your gemstone(s).
- Visit a jeweler twice a year. Just like getting an oil-change for your car, it’s always a good idea to get your ring serviced by a jeweler, at least two times a year. A jeweler has the expertise and specialized equipment to find and fix minor issues before they escalate into bigger ones.
- Know when to take your ring off. Avoid wearing your ring during activities that can subject it to stress and strain including cleaning, gardening, exercising, playing sports, swimming, showering, heavy lifting, etc.
- Store your ring properly. Keep your ring in a dry, cool place, away from sunlight and other jewelry. A ring box, soft pouch or separate compartment in a fabric-lined jewelry box are all great options.
- Buy jewelry insurance. Jewelry insurance gives you peace of mind and protection when your ring gets damaged. Without it, a repair or replacement could cost hundreds or even thousands of dollars.
Protect Your Ring with Personal Jewelry Insurance from Jewelers Mutual
For the best possible coverage for your ring, consider a repair or replacement policy from Jewelers Mutual. Here are just some of the benefits:
- Get coverage for repairs related to accidental damage, a perk that other jewelry insurers and standard homeowners policies typically don’t offer.
- Get a replacement (if needed) that’s of the same kind and quality as the original.
- Choose your own trusted jeweler to work on your repair, not a generic third party selected by an insurance company.
- Experience a smooth online claims process with guidance from jewelry experts.
Check your rate by clicking on the button below!
